


Introduction
What is a state management?
State management is very important topic in the field of software engineering, and it all stems from the need to store app's data.
Let's say we're creating a social media app. Usually some of the features require us to fetch data, in terms of posts, user accounts or their followers and etc. This is usually done by hitting the back-end server to get the needed data. However, some data will be used a lot throughout user session: best example of that is logged user's profile data. It's not really optimal nor cost-effective to send requests every few seconds just to get the same data. That's where state management solutions come into play.
Instead of continually requesting data from the server, we can use storage provided by such state management library (like Redux, Vuex and etc) to store data we need globally, which means we can access it from anywhere within our app, and sync it with the data on the server only when it changes.
What are best state management solutions for Vue 3?
This is a very popular topic right now, and the answer to that question is really underwhelming. There are no "best" solutions, and there never will be.
During the era of Vue 2, library called Vuex was prominently used mostly because it was officially backed up by Vue's core team, who knew very well how framework functioned at it's heart and how to easily implement data reactivity.
However, in Vue 3 (through it's Composition API) we can now access it's reactivity system anywhere, by just importing needed utilities from the library, which made it easier for the community to build their own solutions.
Truth is, the solution you use doesn't matter as much as how you use it. However, good starting point would be to check out Pinia and Harlem, two most popular state management libraries in Vue 3
Harlem.js
In this article I will be going over Harlem.js, what I would call a flexible spiritual successor of Vuex. It's an ongoing open-source project that has seen it's first release just well over a year ago.
There are 2 very compelling selling points of the library:
- Core package is very minimal and light-weight, and all additional features you could need (like actions, syncing to browser's storage etc) can be added through it's extensions
- It makes state immutable outside of mutations
Working with the library
Setting up
The best way to actually learn how to use something, is to build something with it. Let's start by creating Vite project, selecting Vue and installing harlem:
# Initializes Vite app
npm create vite@latest harlem-project

# Installs harlem.js
npm install @harlem/core
If you chose vanilla javascript starter template, your project should look like this:
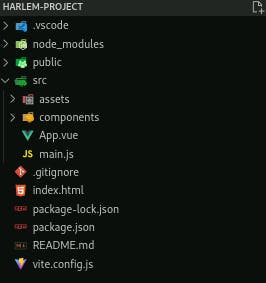
We can add harlem to our project by registering it as a plugin in main.js file like this:
import { createApp } from "vue"
import Harlem from "@harlem/core"
import App from "./App.vue"

const app = createApp(App)

app.use(Harlem)

app.mount("#app")
Since our goal is to get familiar with the library, and for the sake of simplicity, I'll delete components folder and set contents of App.vue to:
<template>
  <div>
    <h1>Hello Harlem.js!</h1>
  </div>
</template>
Understanding the stores
Now that we have clutter-free project we can work with, we'll start working with the library itself. I'll create stores folder, and in it add recipe.js:
import { createStore } from "@harlem/core"

const { getter, mutation } = createStore("recipe", {
  recipes: [],
})
Harlem exposes createStore function from it's core library, which we can use to initialize our store by providing it with two arguments:
- String which will be used as unique identifier (you'll see that this is common pattern in the library)
- An object which represents our initial state/data we want in our store
As it can be seen in the example above, we can destructure things we need from it, like getter, mutation or state.
It's important to mention that we'll use these to work with our store, and while it might seem unnecessary and cumbersome at first, it helps a lot (especially if you are using TypeScript) in telling our IDE with what store are our mutations or getters linked with. Even with regular JavaScript, if you are using smart IDEs like VS Code we get almost complete auto-completion, which makes development experience much better.
Getters
Getters are what we use for accessing state. That might sound very redundant, because one might say: "Well, we can just import state directly for that". While that is completely true, we need to keep in mind scalability and potential complexity of the app.
Let's go through it with some examples:
// Simple, very basic example
export const allRecipes = getter("allRecipes", (state) => state.recipes)

// A bit more complex getter, to get more specific data
export const cakeRecipes = getter("cakeRecipes", (state) => {
  const cakeRecipeArray = state.recipes.map((recipe) =>
    recipe.name.toLowerCase().includes("cake")
  )

  // Note: we could've also returned array directly, or used filter method instead
  return cakeRecipeArray
})
Getter allRecipes is pretty straight forward. Same as before, string that serves as an id, and a type specific parameter: in this case a function that gets state object as a parameter. Getter methods are used for getting data in common ways across an app.
Looking at the more complex example below, we can see how much code is needed to access more specific data. If we imported state right away, in all places we need cakeRecipes we would need to repeat the same code, but If we stick to keeping it in our store file, we can modify that single source of truth to get same results everywhere.
What about working with parameter based getters? Maybe if we need to search for something specific in our state, how could we pass down parameters?
As the library author pointed out here, he recommends implementing regular function or computed property for that. In that case we rely on Vue's reactivity to reevaluate itself, but there's still a strong point being made by wanting to have all your store logic centralized in the single place.
In this case, we can rely on returning a function with wanted parameters in our getter:
// How such getter would look like
export const recipesByChef = getter("recipesByChef", (state) => {
  return (chefName) =>
    state.recipes.find((recipe) => recipe.author === chefName)
})
import { recipesByChef } from './stores/recipe'

// And we could call it just like regular function, passing on what we need
recipesByChef('Gordon Ramsay')
Mutations
Mutations are designed to be the only place where you can change your state. While Pinia is taking a completely different approach of allowing state to be mutated anywhere, harlem exposes state as read-only everywhere except in mutations. While there's nothing inherently wrong with Pinia's approach, having state being permutable everywhere can lead to unpredictable and error prone code.
Let's take a look at some examples:
export const addRecipe = mutation("addRecipe", (state, payload) => {
  const recipe = {
    id: payload.id,
    name: payload.name,
    description: payload.description,
    author: payload.author,
  }

  state.recipes.push(recipe)
})

export const removeRecipe = mutation("removeRecipe", (state, recipeId) => {
  const recipeIndex = state.recipes.find((recipe) => recipe.id === recipeId)

  state.recipes.splice(recipeIndex)
})
In the same manner as before, we're passing on parameter of our mutation just after string id. Now we can import these mutations and call them from UI.
Important thing to note is in the documentation:
It is not recommended to call other mutations within the body of a mutation. This could cause unintended side-effects. Harlem has built-in protection to prevent infinite circular mutation calls from occurring.
So instead of calling methods within one another (like getting all cake recipes that don't have eggs in the same mutation by calling other mutation), we can call them one after another in our component or composable function, where we actually use them. Think of mutations as the most basic unit for editing your state, it's up to you to create castle out of the building blocks Harlem provides.
Final thoughts
Harlem.js is awesome new library, that's simple to use, light-weight and flexible. If you've used Vue 2 with Vuex before, I wholeheartedly recommend migration to either Harlem or Pinia. If you are missing some features, like actions or server-side rendering support - remember to check out all of harlem's extensions.
For the sake of simplicity and relevancy, I'm rounding up this article here. If you are interested in full code, you can find it here.
Let me know what are your favorite state management solutions in the comments 👇